All-Star Baby
Season 2 Episode 203 | 27m 46sVideo has Closed Captions
Sports brings a family together.
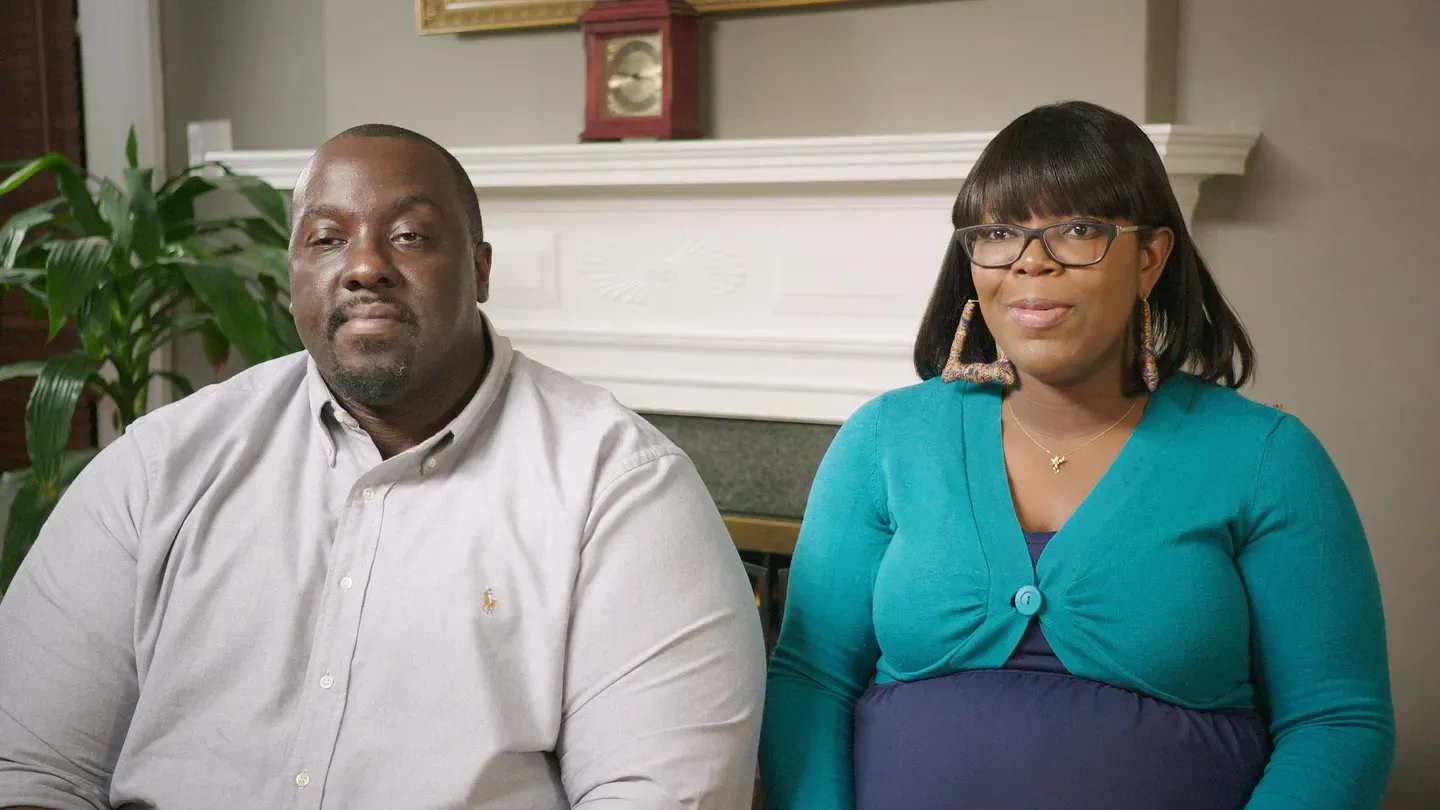
After 18 years together including taking in a special needs teenager, Schrita and Shante welcome a baby of their own. Sports brings them all together.
Problems playing video? | Closed Captioning Feedback
Problems playing video? | Closed Captioning Feedback
Baby Makes 3 is presented by your local public television station.
Distributed nationally by American Public Television
All-Star Baby
Season 2 Episode 203 | 27m 46sVideo has Closed Captions
After 18 years together including taking in a special needs teenager, Schrita and Shante welcome a baby of their own. Sports brings them all together.
Problems playing video? | Closed Captioning Feedback
How to Watch Baby Makes 3
Baby Makes 3 is available to stream on pbs.org and the free PBS App, available on iPhone, Apple TV, Android TV, Android smartphones, Amazon Fire TV, Amazon Fire Tablet, Roku, Samsung Smart TV, and Vizio.
Providing Support for PBS.org
Learn Moreabout PBS online sponsorship-"Baby Makes 3" is funded in part by... -Dear baby, if you can't tell by the bump, you'll be here soon.
To be honest, I'm freaking out a bit.
There's still so much to do, a lot of organizing, name picking, decorating, and cleaning, all while lugging around 25 or so extra pounds.
I guess I'm feeling a little bit crazy, but I'm allowed to be, right?
I'm your mom, and I want everything to be perfect for you.
I'll see you soon.
Love, Mom.
-And by... -When it comes to baby's health, clean water is at the top of the list.
Food News Media, supporting clean water for America's restaurant industry and for baby, for life.
♪ -Welcome to the home of Schrita and Shante, where apartment living suits our couple's busy lifestyle best.
After a long courtship and marriage, our couple brought a special-needs teenager into their home to provide him with the love and support he needed.
Now, years later, there's a baby on the way, so this family is growing.
However, as with many apartments, there's tight restrictions on painting and modifications.
So the "Baby Makes 3" team has been challenged with creating a nursery with fewer design options.
It promises to put us to the test today on "Baby Makes 3."
-That moment when you go from couple to family, everything changes.
When you bring the baby home, you want to create a warm, comfortable, and safe environment for them.
Step one, the nursery.
-Hi.
-So nice to meet you.
-How are you?
-I'm Melissa.
-I'm Shante.
-I'm Jonathan.
-I'm Schrita.
-Congratulations.
-Thank you.
-We are excited to see the space you have for your nursery.
-Awesome.
-Okay.
-Lead the way.
-All right.
-Okay.
♪ This is a great room.
-Plenty of space.
-There's a lot of light.
So what ideas do you have so far?
-Well, we were thinking something along the lines of sports, but we don't really know where to start.
-I like that, but incorporate lots of different sports?
-Yes.
Keep it open, like, a bunch of different sports.
-Okay.
Great.
We can do that.
-We can definitely do that.
I mean, living in a townhome, you're probably dealing with some type of limitations of what you can and can't do.
Have you run into any problems at this point?
-Yeah.
We can't paint in here.
I know we can't knock down any walls, so yeah.
-So anything we put up, it's got to be able to come down with no damage.
-Yes.
Yes.
-Okay.
I think we can do that.
-Yeah.
Actually, what I like to do when I can't paint or put wallpaper up, that you can get these really great wall decals that can cover an entire wall.
It changes the whole look of a room, but you can easily take it off.
So we can look into that, and it doesn't damage the wall in any way.
-Oh, good.
-They're great.
-Yeah.
-Because it is an apartment, we're going to get a rental space, do some of the projects there.
We will see you two at the rental house in a couple of days, and we'll go over the design.
-Okay.
We can't wait to see it.
-Okay?
Great.
-My name is Schrita.
-And I'm Shante.
-And we're pregnant.
-And we're pregnant.
And we've been married 8 years.
-But total, we've been together for 18 years so a long time.
-Yes.
Like, friends and family members all, you know, asking us, "When are you guys going to have a baby?
When are you going to have a baby?"
You know, at one point in time, we didn't get discouraged, but, you know, we looked at it as, whenever God allow us to have it, it'll happen.
Then we were set with an opportunity.
You know, we met Zack.
And I just looked at it like, "Well, maybe this is our calling, and he's going to be our family."
And I know it's a little different family, but we are still family, so... -The most exciting part about being pregnant, for me, would have to be the movement.
I mean, just knowing there's life inside you is, like, awesome.
Like, the kicks, the turns, all that great stuff, that's the most exciting part.
-A little nervous about having such a small baby.
We're new at this, and it's going to be a challenge.
But we have a great support team.
-We agreed on the sports theme because sports is so broad.
I mean, it's no limit to what you can do whether it's football, basketball, tennis, or whatever.
-I'm just a big sports fanatic.
I just hope Bryson has that same passion.
-This is the first time we're creating a nursery off-site.
It's definitely going to create some challenges.
The two of you have really shown a lot of generosity and love in your life, so we want to do something special for you.
-Okay.
-So are you ready to see it?
-Okay.
-Yes.
-Okay.
Here we go.
Schrita and Shante, for your sports-themed nursery, we're going to give it a vintage look, starting with this full-wall basketball-court decal.
This will serve as a backdrop for a crib in a dark walnut finish.
Window treatments and vintage basketball backboard and hoop will add to the sports theme.
♪ Across the room, we'll place a football-field-inspired rug and add a contrasting dresser, complete with a changing pad.
Behind the dresser, we'll create a net-inspired frame with a wall-of-fame pendant overhead for baby's pictures.
We'll make sure your newborn is an all-star.
♪ In the adjacent corner, we'll be placing a comfortable rocking chair with side table and a football-themed lamp to add to the sports-themed look.
Both will see a lot of use as you care for your newborn.
Okay.
See, now, you have sort of an overview of what your nursery's going to look like.
-That looks so cool.
Oh, my gosh.
-Well, before we get started, I have one little surprise for you.
-Okay.
-We got the two of you a camera.
It's one of those instant cameras.
We want you guys to go around and start snapping pictures of us creating the nursery, and then we can start putting those pictures on our wall-of-fame.
-Okay.
-And of course, when baby comes and as baby grows, you're going to take more and more pictures, and the wall-of-fame will grow and grow.
♪ Our net picture frame is easy.
It takes a little bit of time, but only three materials -- the frame, and you can use any kind of frame, the net, and a staple gun.
So this is going to be a really big picture frame.
-Okay.
-And we're going to put it underneath the Hall of Fame, and we're going to hang it above the changing table.
Keeping with our sports theme, we have this net.
And we're going to wrap it around there so you can put as many pictures in there as you'd like.
-Okay.
-Okay.
And we're going to stretch it over here, so just lay it out on there.
Okay.
Now, as you can see, it's really stretchy.
You also have that instant camera that we gave you.
So, what you can do is, we'll start and put those pictures in first.
-Okay.
-And then, when your baby's born, you can start taking pictures of him and putting those in instead of our cute, little faces.
-Okay.
-Okay?
-Cool.
I've never seen anything like the picture frame net before.
It was very unique and very different.
-So we want to take a corner.
-Mm-hmm.
-So I'm going to take this one, and I just want to stretch it out to this corner right here.
-Okay.
-And we're just going to start with one.
We're going to staple this down.
Okay.
So, we have one side stapled down.
-Okay.
-So now what we want to do is we want to take that line, that same line.
We're going to pull that down.
We're going to find that and find that corner... -Mm-hmm.
-...right there.
And you just want to make sure.
Double-check that -- Nope, I got to put it right, that line.
And I'm actually going to put my knee against it so I've got a little more leverage.
Making sure it will straddle the material.
There we go.
-All right.
-Perfect.
Okay.
We're going to do that two more times to each of the corners.
♪ That line.
Yep.
Good.
Does it look good?
-Yep.
-Okay.
So that was actually the hardest part, lining up all of our four corners.
Now, we want to just make sure everything's symmetrical, so we're just going to attach -- We're going to go from the middle on each side.
Okay, Schrita.
Your turn.
-All righty.
I'll give it a try.
-All right.
-See what happens.
-Look.
It's actually really easy to use.
One more step.
-Okay.
-We're going to take some scissors, and we're going to cut off the excess.
-Okay.
♪ -And last one.
-The last one.
-Boom.
Look at that.
Okay.
This is our excess.
Ready to turn it over?
Okay.
Here we go.
What do you think?
-I love it.
-Looks really good, doesn't it?
-Yes.
-And what you want to do is we'll take a picture, when you have the pictures, and you just pop it in here.
And it'll hold pictures.
Also little ribbons or any mementos, you can weave them through there.
-Good.
So we can do away with picture frames?
-Yes.
No, you don't need picture frames.
This is it.
This is your big picture frame.
-Okay.
Cool.
It gives us something to look at.
Instead of one individual picture frame, it's like a collage of pictures, so it's pretty cool.
-Okay, Shante.
So we're here with your reclaimed basketball goal that Dylan from Oak City Customs has built for you.
And he's going to help show you how to put it together.
-Okay.
-All right?
So, Dylan.
-Yeah.
This is going to be pretty easy.
We've precut all the pieces, so now it's time to put it together.
-Great.
-You ready to do it?
-Yeah, let's go.
-All right.
We're going to start with this glue and start putting these pictures of the frame together.
-Okay.
♪ -Cool.
♪ Fold them on down.
-All right.
-Bring your edge back a little bit.
There you go.
-Nice.
-And now you push it in a little bit here.
-Cool.
And you can go with this one.
♪ All right.
Yeah.
Now, put those sides on.
-All righty.
♪ -It should squeeze in nicely.
♪ -Great.
Yeah, snug it up.
Make sure we've got a good fit everywhere.
Nice.
All right.
So now we're ready to put the boards in that are going to be the backboard.
-Okay.
-Same kind of thing.
♪ All right.
Go for it.
-Cool.
Now, go start with the other edge.
Yep.
There you go.
And as you can see, you've got kind of a different color pattern here, so you can kind of lay these out however you want in order to, you know, basically give you a different look.
So we'll let you lay those in there however you see fit.
-All right.
-That glue will get you, huh?
-Yeah.
[ Laughs ] -It's cool.
We'll wipe that off in a sec.
-All right.
♪ -The next step is your break-away rim.
-Okay.
-All right.
So we're going to basically put that just like you would any basketball rim.
-Yep.
-And you're going to drill in a couple of holes.
-So we're at 24, so we want to make sure the center hole's at 12 there and pretty much, other than that, whichever way you like it in terms of the height.
That work for you?
-Yeah, that's perfect.
-Cool.
♪ All right.
Let's throw it on there.
You want to secure it to the board?
-Yeah.
I can do that.
-Very good.
-All right.
I'll hold this in position for you.
♪ All right.
Well, that'll pretty well wrap it up.
I think this thing now just needs some time to dry, and then we can throw on the net.
-Shante did a good job building it.
I love the dark wood finish on the backboard.
He did a really good job for it to be his first time, so I'm proud of him.
[ Both laugh ] ♪ -Schrita, are you crafty?
-I'm a little crafty.
-A little crafty?
We're going to make you more crafty.
-Awesome.
Okay.
-Okay.
-So keeping with your vintage sports theme, we're going to make a Hall-of-Fame banner with these pennants or flags.
-Okay.
-So we've already done one so I can show you what it looks like, and then we're going to color the letters with a gold paint so it has that vintage look.
-Okay.
Cool.
-We get to paint these letters gold, and you want to paint both sides.
And definitely, you want to make sure you get it into the crevices.
-Okay.
-So, are you prepared?
Feel prepared for baby?
-Being first-time parents, it's a lot of things that you worry about.
-Yeah.
Do you have something that you're most looking forward to, like a moment, or -- -I'm really looking forward to the moment of bringing him home and getting settled.
-Yeah.
-I think I'm most excited about that, you know?
-The great thing is, like, this wall-of-fame can grow with your child, and you can keep switching out pictures.
But for the first year, it's really kind of fun to take a picture every month and see how they've grown and changed.
I really like working with Schrita.
She's done a really great job on every project so far.
So, pretty easy, right?
-Very easy.
-Great.
Well, we're going to let this stuff dry.
We have more to do, but we're going to let this stuff dry for now.
All right.
You ready to move on to the next project?
-I am so ready.
-Game on.
-Game on.
-With a sports-themed nursery, I'm assuming you're a sports fan.
Is there a particular sport that you really enjoy?
-Football.
-Football, yeah?
-Yeah.
A big college football fan.
-All right.
So, have you ever built a lamp at any point in time in your life?
-No.
No.
Not really.
No.
No.
-Okay.
All right.
So what we're going to try to do here is basically build a lamp.
And so the idea behind that is you can find parts at hardware stores and craft stores across the board and really put together whatever you want.
What we're going to do is we're going to make a football lamp.
-Okay.
-So again, we're going to repurpose the one that we had had, and we're going to put it all back together, and it should sit nicely in your nursery.
-All right.
-All right.
So in order to do that, start from the bottom and go to the top.
Right here, we still have the weight.
-Yes.
-We've got the bottom piece that'll make that flush.
You've got your cord that's going to run up, and here's your new lamp rod.
And so you're just going to basically will be like you're stringing some beads together.
-Gotcha.
-So it's going to start from the bottom and go to the top.
So the first thing is we'll give you that.
You can run down that down the pole.
♪ All right.
Next thing is going to be this.
And, again, as you feel it and as we're putting more and more on it, the more and more weight, it's going to kind of go back and forth.
And then you're going to put this piece on.
Yep.
All right.
So then the next pieces we're going to put together are going to be the cover for the rod.
So we'll start with this piece, and that will sit just like that.
-And we're going in this way.
-That's correct.
-All right.
-You're going to want this to sit snuggly into it, and then you'll run that down through it.
♪ So again, just like putting, you know, a necklace, beads on a string.
Popcorn around a tree.
-All right.
♪ There's your spacer, and then we're going to do, I believe, that piece right there.
Now comes the piece that we've all been waiting for, the helmet.
-All right.
So what we've done here is, again, we've stripped this helmet out, so we have basically a clear, open form to work with.
And so the very top of this helmet is going to have a hole that we're going to feed this through, and it's going to sit nicely right here.
All right.
So try to see if we can do that.
I will hold this for you, as well.
-Let's see if you can line it up.
-Right.
Bring it down a little bit.
All right.
Very nice.
All right.
Good deal.
So now what we've got to do is finish off this piece here.
That's going to come all the way down.
We will sit there and tighten it up as best you can with your fingers.
Okay.
So now that we've tightened this up, we got a pretty sturdy base.
-Okay.
-Seems to be, you know, what we wanted it to be.
And so now the next thing would be is to give it a little bit of power.
-All right.
-All right.
So the next step would be is we're going to install the piece that holds the bulb, right?
-Okay.
-So you're going to pop the bottom off just like that.
It's going to expose your hot and neutral.
All right.
We're going to put this on first, so you're going to run those two wires.
And again, these wires can be adjusted.
So you can pull this out and the bottom, and then you can get it to where you need it to be.
-Okay.
Are we going to screw it?
-Go ahead and screw that down, and then we can just make adjustments from that point on from there.
So you've got two colors.
You're going to have a silver, and you're going to have a gold.
The gold is going to represent your hot, and the silver is going to represent your neutral.
So when you look at these wires here, you can see that they're both the same color.
So the one that has the writing on it is going to signify the hot, and the other one is neutral.
So let's go ahead and connect these real quick.
I'm going to flip it over and do the other one real quick.
All right.
We should be able to slide this.
That's connected.
You should be able to slide this back down in its base.
-Okay.
-Then what we're going to do is, underneath, we're going to have you pull that wire.
There you go.
Okay.
-Little more?
-Yeah, go a little slow.
-Oh, sorry.
-There you go.
All right.
That should be enough.
Okay.
That's going to be where we want it.
Pull that out.
Now, we're going to check and see this light bulb back here.
All right.
We're going to screw that in, and we're going to test for power.
♪ And we're going to cross our fingers that it works.
-Okay.
♪ We have power.
-We have power.
How about that?
-Way to go.
-Looks nice.
-I want to introduce both of you to Justin.
He's a nursery furniture expert.
-How are you doing?
-Hi, guys.
How are you doing?
-Hi, Justin.
How are you doing?
-Nice to meet you.
-All right.
-And then I want to introduce you to your new crib.
-This is lovely.
We love it.
-First and foremost, this is ash gray.
I know said you liked the color.
-Yes.
-So this one is ash gray.
It gives it more of a vintage feel.
There are three types of woods that all cribs use.
It comes with pine, poplar, or hardwood ash or oak.
-Okay.
-This particular is poplar, so it's a harder softwood.
With the convertible cribs, they are allowed to convert from the crib to a toddler bed to a full-size bed.
-Okay.
-Allows the crib to grow with you baby over time.
Think of it this way.
The same bed that you're laying your newborn in is the same bed they can lay in before they go off to college.
So it's got a lot of connections towards it.
-So how do we convert it?
What are the steps?
-So the steps to converting this crib into a toddler bed, of course, you would have to take off your footboard.
Once you take off your footboard, there should be a stabilizer bar to make sure that your side panels are still connected, and then you connect your toddler rail.
So here is your toddler rail.
-Okay.
-It'll go like so along the front side of your crib, and your mattress will correspond with where your rail is... -Okay.
-...to allow your baby to get in and out independently.
-Okay?
-Okay.
-So this prevents him from rolling out of bed.
-Absolutely.
-But he can get out on his own.
-Absolutely.
That's exactly what it is.
-Great.
So let's go to my favorite part, which is turning it into a full bed.
-All right.
-Let's do it, guys.
-Yeah?
Ready?
Okay.
-While Melissa's getting the rails, of course, like I said before, you have to drop your side panels.
-Okay.
Are these pretty easy to remove?
-Absolutely.
They're very easy.
We can definitely take care of it right now.
-Okay.
Awesome.
♪ -All right, guys.
This is your headboard for your full-size bed.
-Okay.
-As you can see, it does not look like it will be a crib once you take everything else off of it.
-Okay.
-Now I have the rail.
-Absolutely.
-All right.
-So what I want you to do is, in this cut in here, if you would insert these metal hooks... ♪ ...like so.
-Oh, wow.
That's easy.
-And we would do the exact same thing that we did here on the opposite side.
-Okay.
-Shante, will you grab the footboard?
-No problem.
-And we'll put that in.
♪ -These are your slats so that you can make sure your box spring is sturdy when you put it on your frame.
-All right.
What do you think about that?
We went from a crib to a toddler bed to a full-size bed.
-Yes.
It doesn't get any better.
-If you think about it, you buy a crib.
Some cribs can range from $300 to $800.
-Gotcha.
-So you got to buy a toddler bed after that.
You spend another $200, $300 on top of that.
-Yes.
-With this piece, you're buying one item, and it's lasting you for 18 years.
-Right.
So worth it.
-Priceless.
Priceless.
-Well, thank you, Justin, so much.
This was so helpful.
-Absolutely.
-Thank you.
-Nice to meet you guys.
-Thank you.
-All right.
Thank you.
-The crib is awesome.
We love the color.
We love how easy it was to transition from a crib to a toddler bed to a full-size bed, so that's the great part about it.
-Awesome.
Great thing.
Purchase one time, and it'll last you forever.
-You ready to do more painting?
-Yes, I am.
-Well, these are dry.
-Okay.
-They look nice.
-Yeah, they do.
Came out great.
-Yeah.
So what we want to do is we want to add this white stripe to the top.
That way, it'll really look like a pennant.
-Gotcha.
-So I've already taped it, as you can see on both sides.
-Okay.
All right.
-We're going to take some white paint.
We're going to apply it just to the top to that strip right there.
-Okay.
-So one of the things I want you to think about when you're painting is I want you to paint away from the tape.
-Okay.
-You paint this way, then we're going to get a glob of white paint right there.
-Okay.
So paint away.
-Yes.
-Okay.
-And then also, you want to make sure you get those holes.
And this white paint, because the stain is so dark... -Okay.
-...it's going to come through the white paint.
So we're probably going to put four or five coats on.
-Okay.
-But it dries really quickly.
And you want to get your edges, too.
So after we finish painting, we're going going to take these letters, and we're going to glue them to our flags.
-Okay.
Good enough?
-Yeah.
That looks great.
-All right.
-I think we can let these dry.
-Okay.
-And when they're done, we can start adding the letters with some wood glue.
And then, when that's done, we can string it up.
-Cool.
♪ -Then you're going to pull all this string through.
♪ Oh, look at that.
-Awesome.
♪ -Next time on "Baby Makes 3"... Our vintage sports-themed nursery continues with a number of creative projects, including a ticket stub keepsake box, a shadow box of vintage athletic gear, and our clever fly-ball mobile.
We'll be applying our full-room decal and adding lots of finishing touches.
♪ When we're done, we'll make sure Schrita and Shante's newborn feels like an all-star, next time on "Baby Makes 3."
-Oh, my.
-Wow.
-This is so nice.
♪ -Closed captioning is brought to you by The Genius of Play, encouraging happier, healthier kids through the power of play.
Learn more at thegeniusofplay.org.
-"Baby Makes 3" is funded in part by... -Dear baby, if you can't tell by the bump, you'll be here soon.
To be honest, I'm freaking out a bit.
There's still so much to do, a lot of organizing, name picking, decorating, and cleaning, all while lugging around 25 or so extra pounds.
I guess I'm feeling a little bit crazy, but I'm allowed to be, right?
I'm your mom, and I want everything to be perfect for you.
I'll see you soon.
Love, Mom.
-And by... -When it comes to baby's health, clean water is at the top of the list.
Food News Media, supporting clean water for America's restaurant industry and for baby, for life.
-"Baby Makes 3" nurseries are created for newborns.
Some projects may not be suitable for older children.
When in doubt, seek the help of a licensed contractor.
For more information, visit us on the Web at babymakes3.tv.


Support for PBS provided by:
Baby Makes 3 is presented by your local public television station.
Distributed nationally by American Public Television