E20 | Electric Bill Investigation | Ask This Old House
Season 23 Episode 20 | 23m 42sVideo has Closed Captions
Basics of dethatching and aerating; investigating a high electrical bill; routers 101.
Lee Gilliam and Kevin O'Connor explain two different processes to keep lawns looking lush and green- dethatching and aerating; Heath Eastman investigates a homeowner's high electrical bill by installing a smart home energy monitoring system to track what circuits are drawing the most power; Tom Silva and Kevin go over the different types of routers and their accessories.
Problems with Closed Captions? Closed Captioning Feedback
Problems with Closed Captions? Closed Captioning Feedback
Funding for THIS OLD HOUSE is provided by The Home Depot and Renewal By Andersen.
Support provided by:

E20 | Electric Bill Investigation | Ask This Old House
Season 23 Episode 20 | 23m 42sVideo has Closed Captions
Lee Gilliam and Kevin O'Connor explain two different processes to keep lawns looking lush and green- dethatching and aerating; Heath Eastman investigates a homeowner's high electrical bill by installing a smart home energy monitoring system to track what circuits are drawing the most power; Tom Silva and Kevin go over the different types of routers and their accessories.
Problems with Closed Captions? Closed Captioning Feedback
How to Watch Ask This Old House
Ask This Old House is available to stream on pbs.org and the free PBS App, available on iPhone, Apple TV, Android TV, Android smartphones, Amazon Fire TV, Amazon Fire Tablet, Roku, Samsung Smart TV, and Vizio.
Keep Exploring


This Old House Insider Newsletter
Get This Old House exclusive stories, tips, and behind-the-scenes information delivered right to your inbox every month.Providing Support for PBS.org
Learn Moreabout PBS online sponsorship♪♪ Kevin: On "Ask This Old House," our experts travel across the country to answer questions about your house.
♪♪ Today, Heath helps a homeowner troubleshoot his rising electric bill.
Heath: This one's moving pretty quickly.
I'm going to guess this one's for you.
Kevin: Then Tommy gives us a primer on routers.
Tom: You put a bit in, and that bit gives you the profile or detail that you're looking for.
Kevin: And Lee shows a few good tools to get our lawn ready for spring.
On "Ask This Old House."
♪♪ Kevin: Hey there, Lee.
Lee: Hey, Kevin.
Good to see you.
How are you?
Kevin: I'm good because I'm talking to you and I'm talking grass.
Lee: Let's go.
Kevin: What are we doing today?
Lee: Talking dethatching.
Kevin: Nice.
Lee: Okay?
I got a piece of sod here.
Let me show you the thatch layer.
Runs all the way down here, and that's what we want to get out.
Kevin: So, the thatch that's in there, it's basically last season's lawn that's laid down.
Lee: Yes.
Kevin: And now the new stuff has grown up over it.
Lee: Yep.
Kevin: And why do we want to pull it out?
Lee: I want to pull that out so I can get water down in there into the root system as well as any nutrients as fertilizer, compost, things like that.
Kevin: Okay.
Lee: And some daylight too.
Daylight's got to get in there.
Kevin: Yeah.
And if I've got a small yard, how am I dethatching?
Lee: Well, small yard, we could use a rake.
Kevin: Yep.
Lee: You know, this rake here really works really well.
Kevin: Not your conventional rake leaf like that most people think of, but it's real stiff tines.
And that's going between the live grass.
And so you're down there literally just back and forth.
Lee: Correct.
And it pulls it right out compared to a regular rake that will -- you know, this is more like picking up leaves and grass and things like that.
Kevin: Yeah.
Okay.
And guys like you and I, we don't have small yards.
Lee: No, we don't have small.
Kevin: So we got a big yard.
Lee: We're going over to the dethatcher.
Okay?
Kevin: Yes, alright.
Lee: This has a lot of tines on it.
It spins real fast.
It rakes it all up.
Gets it all out, gets it all up nice.
Kevin: I rent one of these every spring.
The power rake.
Lee: Yes.
Kevin: I bring it home and I put my kids behind and I say, "Get to work."
Lee: There you go.
Kevin: Yeah, but right now I want to get to work.
Can I fire it up and get you going?
Lee: Let's go.
Yeah.
Kevin: Let's get this thing out.
Lee: Alright.
What do you think?
Kevin: I'm ready, baby.
Lee: Okay.
Kevin: I am ready.
Lee: Hit the on.
[ Engine sputters ] Should be good.
[ Engine starts ] Beautiful.
Squeeze the lever.
Good to go.
[ Engine rumbling ] See the thatch?
Look at that.
Kevin: Yeah.
I mean, look at all of this material, huh?
Lee: What do you think?
Kevin: So, obviously, the lawn needed to be thatched.
Lee: Yes.
Kevin: You know, to the untrained eye, that's a little disconcerting.
They think they're tearing up the lawn.
Lee: Nope.
Doing what you need to do.
Kevin: Yeah.
Lee: It's getting it all out.
Kevin: Very nice.
Just waking it up.
Lee: Waking it up.
Kevin: Satisfying, I like it.
Lee: Yes.
Works good, doesn't it?
Kevin: It does.
So what else are we talking about?
Lee: So we're talking about aeration now.
Kevin: So the basic idea with aeration is we're going to put holes in the lawn.
Lee: Correct.
Kevin: So that we can get air in.
Lee: Yes.
Kevin: But also... Lee: I can get water in there.
I can get nutrients in there I can o-- I can compost when I want to overseed, things like that.
These here are for shoes.
Work nice for small property.
Kevin: So this you're suggesting you put on the bottom of your boots?
Lee: Yes.
Kevin: This way?
Lee: Yes.
Correct.
Kevin: [ Laughs ] And then you're walking around and you're literally just using your body weight to press into the soil, the sod.
Lee: Mm-hmm.
Problem with this is it compacts it a little bit more, but it still opens it up, okay?
Kevin: Right.
Lee: The way to go is doing a core aeration.
Okay?
Kevin: Core aeration.
So this is obviously more aggressive and for bigger areas.
Lee: Correct.
Kevin: So the machine goes in.
It literally takes a plug out, pulling it out, and throwing these down on the lawn.
Lee: Yes.
Kevin: And then it leaves a hole basically that size.
Lee: Correct.
And then some people want it cleaned up and some people like to leave it.
I like to leave it because that's all still a lot of nutrients there and things like that.
Kevin: Yeah.
I mean, I leave it too because I mean, in a week or two it's gone.
It's broken down and all like that.
Lee: Totally.
Kevin: That's going to be done by a bigger machine.
Lee: Yes.
And I brought that over here.
It's an aerator.
Kevin: Yeah.
Lee: A lot of cores on it.
Kevin: I use one of these as well.
I do not let my kids use this yet because it's kind of aggressive.
But I love this one.
Can I also fire this one up?
Lee: Sure.
Let's go.
Yep.
[ Engine starts ] Press it down.
Here we go.
[ Engine rumbling ] Kevin: Yeah, so grass is a little long, so it's not completely obvious.
But if you come to a bare spot.
Lee: Yep.
Kevin: You can see all of the hollows... Lee: Exactly.
Kevin: ...left behind.
Nice core right there.
Lee: Yep.
Kevin: That's going to be effective.
Lee: Yes.
Kevin: Also satisfying.
Lee: Nice workout, right?
Kevin: I love it.
Alright, so let's talk about timing.
When do you want us to dethatch the lawn?
Lee: I want to dethatch the lawn in early spring.
Kevin: Yeah.
Lee: Okay?
That's probably only one time I want to do that -- early spring for that.
Kevin: And unlike the cores with the aeration, you want that all pulled up?
Lee: I want to pull it up.
I want to take it off, exactly.
Kevin: When I do it in the spring, you know, the first day or two, you're like, "Uh-oh, everything looks kind of thin," but literally within three to five days, it's starting to come back.
Lee: After you dethatch and you put down your pre-emerge, you know, your first step, fertilizing, it greens up real nice.
Kevin: Beautiful.
And when do you want to aerate?
Lee: Aeration -- I like to do two, three times a year.
Kevin: Ooh!
Lee: As after I dethatch it, springtime, I'll go like to aerate it.
And then maybe later in the summer and then definitely late summer going into fall.
Then I overseed it then.
Kevin: Perfect.
Lee: Okay?
Kevin: Seed gets down in there.
Lee: Correct.
The water gets down in, the seed gets down in.
You can break it all up and maybe add some compost on it.
And you're good to go for the next, next following spring.
Kevin: Alright.
Great information.
I appreciate it.
Lee: Alright.
Kevin: Three times a year?
I'm going to need more kids.
Lee: That's up to you.
Kevin: That's true.
♪♪ Heath: So lately, I've been getting a lot of e-mails from people questioning their electric bills, and they're starting to wonder why they seem to be getting so high.
Now, while there could be a couple of reasons for this that aren't related to actual usage, such as the rating being increased or your meter possibly being faulty, chances are that's a little more unlikely on the meter end of things.
It's more likely that it's something that you're utilizing that you don't realize -- the little incremental things you've added to the home, such as EV charging, heat pumps, more things using electricity, possibly doing more laundry.
Those things can really add up.
So today we're heading to meet a homeowner to try and help him diagnose just exactly why his bill seems so high.
♪♪ Alright, Rob, so I saw that you wrote in about concerns of your electric bill.
Rob: Yeah.
In the winter, we're seeing a drastic spike, almost double what we're seeing in the summer.
Heath: Double over what you see in the summer?
Okay.
I mean, the place looks great.
I mean, how old is the house?
Rob: The main portion of the house is 1875, so we're coming up on 150 years.
Heath: Wow.
And I'm assuming you renovated the kitchen recently, from the looks of it.
It looks pretty nice.
Rob: Done a lot of cosmetic updates.
Added a mini split for some AC and heat, some appliances.
Heath: What else do you have for heating and cooling?
Rob: We have an oil furnace that heats the main part of the house as well as our second-floor tenant.
Heath: That was my next question.
I saw that.
When we were walking in, I saw a couple of meters.
So you have tenants?
Rob: Yep.
Two tenants.
Second floor shares heat with us.
Heath: Okay.
I only saw two meters, so...
Rob: Third floor has their own meter.
Heath: Okay, so third floor has their own meter.
So your meter does yourself and a tenant above as well.
Rob: Yep.
Heath: And it looks like everything else is electric in the house.
Electric cooking, electric dryers.
Rob: Yeah.
Electric water heater and well pump.
Heath: And a well pump?
Rob: Yeah.
Heath: And that well pump is feeding everybody?
Rob: Correct.
Yep.
Heath: Okay.
So we do have a lot of a load here, but what I'd like to do is take a look in the basement, see what we have for panels.
Do you mind showing me?
Rob: Yeah, definitely.
Heath: Alright.
Alright, so that's the service for everything?
Rob: That's the panel, yep.
Heath: Okay.
So, it looks like we have -- we have the two meters outside.
We have looks like the main one, the 200 is coming in right to you that feeds this.
Rob: Yep.
Heath: And this feeds your second floor as well?
Rob: Correct.
Heath: For that tenant?
And then the separate meter is for the third floor only.
Rob: Yep.
Heath: So they should be all by themselves.
So you had some questions about the panel?
Rob: Yeah.
Uh, my concern was the age of the panel and maybe that was causing some of the issues.
Heath: The panel is definitely older, looks a little rusty, but it's probably not in that bad of shape.
And chances are it's not going to cause the issue you're seeing.
Unless we had a major malfunction inside, which would be showing much more damage.
So I don't think that's it.
But if I take a look inside, I mean, I think you have a lot more going on in here than you may have thought.
Rob: Yeah.
Heath: You know, it looks like we have multiple electric ovens, multiple dryers.
I'm looking at a shop sub panel.
Does that make sense?
Rob: Yep.
The garage has its own panel that is fed from here.
Heath: Okay.
And then we have... Yeah, we've got one that's a two-pole 100.
That's a kitchen panel too.
Rob: Yep.
That feeds the kitchen, the appliances.
Heath: Okay.
Well, this might make sense but I want to know why it's so different.
Why is it so low in the summer and so much higher in the winter?
So let's go outside and take a look at the meter.
You actually have analog meters, I noticed, when we were walking in.
Rob: Yeah, I do.
Heath: We can physically see how fast they spin.
So we'll go see what it's doing right now.
And then we'll try turning a few things off and see that it slows down and make sure it looks like it's operating properly, and then we'll go from there.
Rob: That works for me.
Heath: Alright.
Alright.
So these are the two meters.
So this one's moving pretty quickly.
I'm gonna guess this one's for you if looks are everything.
And it looks like your upstairs tenant is barely moving.
I'm guessing they're not home?
Rob: Yeah, they're not home.
Heath: So there's not much being used, so you can see the difference.
It's nice that we have the analog meters where we can actually physically see the dial spin and see what our real-time usage is.
So I think what I want to do is I want to go downstairs, turn some of the bigger items off, see if we can make this slow down a little bit, and take a look and see if that actually works.
Rob: That works.
Heath: Alright.
Alright, Rob, so you saw how fast that meter was spinning.
It's moving pretty good.
So I think the biggest one is going to be probably this kitchen panel.
I think we have a lot on there.
It's a pretty big feed, so let's start by... Let's turn that off.
Let's go take a look outside and make sure that slowed down a little bit.
Rob: Awesome.
Heath: Oh, check that out, Rob.
Look how much slower that's going now.
Rob: Oh, yeah, that's a lot slower.
Heath: And that's just by turning off that kitchen panel.
So that tells us that that panel was using quite a bit of power that we maybe didn't even realize.
So the last thing I'd like to try is I want to turn the main breaker off to this, make sure this comes to a complete stop, and then we can kind of proceed from there.
Let's go take a look.
Alright, so turning the main off did bring that to a stop.
And your neighbor is still spinning just a little bit.
So, you know, looking at it quickly it seems like everything's separated and operating as it should be.
Rob: So do you have any recommendations on getting to the bottom of this or...?
Heath: Yeah, the only thing I can think of is I actually have an energy monitor that I can install, and we can kind of see what might be being used that we're unaware of.
Rob: Yeah, I mean, that'd be great.
Heath: Alright.
Let me run to the truck and I'll grab that and I'll meet you inside.
Rob: Alright.
♪♪ Heath: Alright, so before we went ahead and installed all this, I kind of wanted to show you the components of what goes into this and see if you have any questions on anything.
So the first piece that's going to go in is the brain here.
And this is the piece that's going to go in where everything's going to plug into.
This is the actual monitor itself that'll go in the panel and everything will connect to it.
Next we're going to power it.
And one of the things you have to consider when we're doing this is what do you power it with and how.
it's nice in your case we have physical space.
We want to have a two-pole, 15-amp breaker to power this -- one on each leg.
And that's perfect.
You have that open spot.
If you didn't, you'd have to share with another circuit or take something else off to make this work.
The next thing is we got to consider connection to the network.
So we're going to be using Wi-Fi for this.
So we're going to be using this antenna plugged into the system and sticking out of the bottom of the panel.
So I guess the question is how's the Wi-Fi in that section of the house?
Any idea?
Rob: Yeah, it's actually pretty good.
We just had it upgraded.
So we have strong signal over there.
Heath: Perfect.
So that's the hardest part is having that for the backbone.
Now that we have it powered and we have a connection to the network, we want to look at actually monitoring the power.
So we're going to start with the main CTs, the current transformers that go around the main two feed wires that come from outside and go either to the main lugs or the main breaker.
In your case, they go to the main breaker.
So we're going to have two of these, one for each wire.
It's going to go just simply around it.
Click into place and you want to make sure that's clipped in.
And you want to pay attention to the direction.
We'll do that twice for the two mains, plugs in as well.
That's going to monitor how much power is being utilized by the house as a whole.
We can actually use that to monitor the kilowatt hours overall and see if that matches your bill.
That'll tell us if the meter is truly accurate, if everything's matching, and if at least that part adds up.
With that, though, we want to find out what's causing the problem in the winter.
And that's where the smaller CTs come in.
So we can plug into 16 of those on the front of this unit, and that we can put on individual branch circuits or on something like dryers, the panels, that kind of thing.
So once we have these isolated, we have the circuits that you want to monitor.
We're going to make a list of those circuits.
And then we're going to use this app to go ahead and get this fired up.
And as you can see the field is empty right now.
But once it's connected and it's powered up, you're going to start to see this graph fill out and see the actual data of power being used.
We might find out that, hey, at nighttime, for some reason, this kitchen panel is really using way more than we ever thought it was.
Let's go find out why and we can start turning off individual breakers.
Or if you want, you can add a second one of these on that panel as well.
So if 16 is not quite enough for you to monitor, we can always add another 16 with another unit to this.
Rob: Sounds good to me.
Heath: So I think the next step is to jump down to the basement and get it installed.
Rob: Yeah.
Let's go.
Heath: Alright.
So now that the power has been disconnected outside, I'm going to go ahead and take the panel cover off.
Next I'm going to verify that the power is really off by using my multimeter.
Alright.
So I'm going to set the monitor in place.
And the first thing I'm going to do is put the antenna on.
And then I'll put the main CTs on to close this side out.
So next I'm going to install the two main current transformers around the main wires that go into the breakers.
And I want to pay attention to which way they go.
I want the arrow facing the breaker like this on both of them so they read properly.
And finally we'll install the 16 small current transformers on the circuits we want to monitor.
♪♪ ♪♪ Alright, Rob.
So power's back on.
Everything's cleaned up.
I put all my tools away.
It should be up and running.
You all connected to the app?
Rob: Yeah.
Everything looks good.
Heath: Perfect.
So we're gonna let this run for a little while.
I'll probably come back in about two months to check in on you and see what we have.
I'll be honest, I'll probably be in touch before that.
Make sure we answer any questions, make any adjustments we need to make.
But other than that, I think you're pretty good.
So I'll plan on swinging back in about two months and hopefully we can find the issue.
Rob: Alright.
Thank you.
Heath: Alright.
Thanks a lot.
Rob: Thank you.
♪♪ Kevin: Tommy, you look like you're in your happy place amongst the routers.
Tom: I love a router.
It basically can dress up any plain piece of wood real simply.
Kevin: So give me the 101, please, the options that we have.
Tom: Let's start with the small router right here.
This is a single handheld router.
It's called a trim router, does all kinds of things.
And basically it's -- it's really something that you put a bit in, and that bit gives you the profile of detail that you're looking for.
Kevin: Essentially what makes a router a router, right?
I mean, if you've got the motor that spins a bit, you're in the router world.
Tom: You got a router.
The bigger the motor, the bigger the router.
Kevin: Another trim router here, fits in my hand.
Why did you put the homemade base on it?
Tom: Well, just to show you that the base that comes with the router sometimes doesn't work for all cuts that you're doing.
And this was what I use if I'm doing a mortise in the middle of a piece of wood or something like that and I don't want the router to fall into that -- that void or base.
Kevin: I thought you were going to flip it over and show us the use of sort of a homemade router table, right?
Tom: Well, yeah, absolutely.
Kevin: You can turn it upside down.
Tom: You can turn it upside down.
You can actually take that router and make a mortise in this board for that to fit flush in there so you have a router table.
Kevin: And then you work your material from the top.
Tom: Exactly.
Kevin: Okay.
Tom: A lot of people love them.
Kevin: So if you jumped up in terms of motor size, you're going to get to the next level.
More horsepower coming out of those.
Tom: More horsepower, bigger horsepower.
And lots of times it's not -- it's not the speed, but it's the horsepower that's going to do it for you.
In other cases, it's the speed that's going to help you and not the horsepower.
Kevin: Right.
Tom: Alright.
So here's a router right here with a fixed base.
But it also can go into a base that is plunge -- I call it a plunge base where it locks in here.
And now I have the flexibility or capability to take and control this router up and down easily.
So if I want to change the depth or if I even want to drill a hole really deep, you can drill it.
So I use it like a small drill press.
And that basically is going to give you a nice straight hole.
Kevin: So you can hop around from different workspaces, or you can actually use it to make sure that you get the exact depth that you want.
Tom: Right.
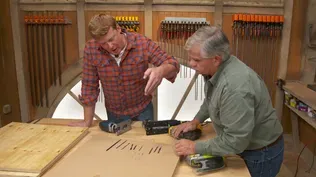
Let's say I want to cut a little dado.
I would take this router here and I would bring it down and gently touch the router bit against the top of the table.
And then I would adjust this right here.
Hold that board right on the top.
I would take my depth stop, bring it down, push it down onto the wood, release it, bring it up.
So now when I wanted to make my cut, I would take, bring it over wherever I want to cut, say right there.
I'm going to go into the hole and I would make a series of passes to get to all the way down, and that would be the exact depth that I wanted.
So you can see right there, if you hold that board, I bring it down.
Kevin: Ooh, look at that.
Tom: That's set perfectly.
Kevin: Perfectly right there.
Tom: But the tricky thing with the router is you don't want to cut that all at once.
So I would do it in a series of passes like one, maybe two or three and bring it where I want it to be.
Kevin: Okay, so making a rabbet, you're going to want to try to follow something.
You're going to want to make a straight line, but sometimes you're trying to follow the perimeter of something.
So you've got different bases, different attachments?
Tom: Right.
Alright.
So let's say it would be the bit.
So here's a flush-cutting bit.
There's a bearing on the bottom.
And if I wanted to trim off -- Let's say I had a laminate on the surface here.
I would take the router and run it around.
The bit would come down, the bearing would hit the side and it would cut it, flush-trim it right off.
Kevin: Mm-hmm.
Tom: Alright?
But let's say you wanted to make a template and I wanted my piece to be slightly bigger, then I would mount this templating guide on the bottom of the router itself and use the bit to come in, and the bit would come down and I would be away from my template making my piece that I wanted a little bit bigger.
Kevin: Right.
Okay.
And in this case you're talking about the bits quite a bit.
There are lots of options out there.
This is your... Tom: Yeah, a lot of options.
Kevin: What?!
Tom: That's a small variety of bits right there.
I mean, there's a chamfer, there's roundovers, ogees, moldings.
You name it.
Kevin: Straight right there.
Tom: Dovetail.
Kevin: Dovetail, yeah.
Tom: Yeah.
Whatever you want.
And if you don't see something here, companies that will make them for you.
Kevin: It's the versatility, right, between all of the different bits, the bases, the templates, the collets.
That versatility is what you love about the router so much.
Tom: Yeah, so whether you're working around your house and you want to build cabinets, or you want to build a -- copy a detail of a molding or a base molding or something like that, and you don't want to buy a particular molding or you want to change the species, you have a molding detail that will -- a profile detail that will match yours, put it in and make your own.
Kevin: Alright.
I like your happy place.
Thank you.
[ Both laugh ] Tom: Alright.
Kevin: It's good to be amongst your routers.
Tom: I love a router.
♪♪ Heath: So, it's been about two months since we installed the energy monitor at Rob's house.
Now, we've been in constant contact with him this whole time, and he says he's getting some great real-time data.
So today we're on our way back to the house to take a look and see if we can find what the culprit is that's causing that bill to be so high.
♪♪ [ Knock on door ] Hey, how's it going?
Rob: Good.
Welcome back.
Heath: Rob, it's good to see you again.
Rob: Yeah, you as well.
Heath: So I got to ask, have you been checking out the app and keeping an eye on things?
Rob: Yeah, the thing's pretty awesome to be able to see everything that's going on.
Heath: It's really crazy how well-detailed that is, right?
Rob: Oh, yeah.
Heath: And it's kind of addictive to sit there and keep watching.
Rob: Oh yeah, it definitely is.
Heath: So let's just take a seat and go over some of the things we found out.
Rob: Alright.
Heath: Alright, Rob.
So why don't we pull this open and get up to see what's going on live?
Did you find that looking at the monitor and matching it to your electric bill, did it seem to add up?
Rob: Yeah.
Lined up pretty -- pretty well.
I mean, they looked pretty identical.
Heath: Unfortunately, it's not what you want to hear, but that really is what you're probably using.
Rob: Yeah.
Answered some questions, but... Heath: Alright, so here's our energy monitor in use.
And we can see this is real time.
And we're monitoring second by second.
And you know it's operating properly because we're seeing this number change constantly as things turn on and off and cycle.
The nice feature about this system is we can actually go back and look at things with a week, month, or even a year previously.
So if we go back for the month, we can see how much power has been utilized this month and we can -- Nice, good news is, is that we can see the tenants really haven't used much at all, so that's a good thing.
I wonder if they're even home too much.
But we did find kind of three major culprits of what's using the most electricity in the home.
The first is the mini split, and you can see we have shop panel one and shop panel two.
The mini split is on that shop panel.
The reason I have it broken up into two is because I wanted to monitor each phase and make sure things are balanced and nothing else is turning on in there as well.
Second is the well pump.
Same thing -- that's on the kitchen panel, and we monitored those separately as well.
And the third one is the water heater.
And you can see how much that water heater uses by itself.
Rob: With those all being necessities, is there any place we could save some money?
Heath: I think there is.
So we'll start with the heat pump.
You know, I think the heat pump is kind of why we were seeing that spike in the winter that you were concerned about.
So on a cold day where it's, you know, maybe 25, 30 degrees out and the heat pump's working, it's using a certain amount of electricity, but as it gets colder, it has to work harder.
It's going to use more.
And I think that's why we're seeing that spike, especially with the cold temperatures in the wintertime.
Um, next would be the well pump.
Again, you're paying for a well for three families in this house, but you don't have a water and sewer bill.
Rob: That's true.
Heath: So that might be a little bit of an offset as well.
The last one with the water heater I think is a pretty easy solution.
You have a purely electric water heater now.
I think if you change it over to a hybrid heat pump water heater, I think it'll save you quite a bit right off the bat.
Rob: Alright.
Yeah.
I mean, I'll have to take a look into those.
Heath: But the bigger thing is, have you considered solar with everything you have that's electric in here?
Rob: Actually, I just reached out to get an estimate to have some solar panels put on my roof.
Heath: I think that would be a game changer for you.
I think that would save you a ton of money, and you'd be able to see it in real time.
Rob: Yeah.
Heath: So unfortunately, I don't think we had any surprises, but we do have a lot going on in this house.
But at least you know exactly what's being used and why, and hopefully it'll help you save in the future.
Rob: Alright.
Thank you.
Heath: Alright.
Thanks.
♪♪ Kevin: Next time on "Ask This Old House," Lee heads to Austin to help a homeowner expand their irrigation system.
Then Richard talks pipes -- PEX versus copper.
What do you prefer?
Where are we going?
What does the future hold?
Richard: Depends.
Kevin: And Nathan shows a homeowner how to fix a stripped screw hole.
Nathan: So this is the most common one to become loose first.
There's a lot of different ways to fix it.
Let me show you what I got.
Courtney: Alright, let's do it.
Kevin: All that on "Ask This Old House."


Support for PBS provided by:
Funding for THIS OLD HOUSE is provided by The Home Depot and Renewal By Andersen.